How To Build Overhead Cabinets in a Camper Van
Constructing overhead cabinets is one of the best ways to boost storage space in a camper van. In our tiny home, we use these upper cabinets to store our clothes, dry food, and electronics. And so, in this post, we take a step-by-step approach to show how you can construct your overhead cabinets in a van conversion.
Along the way, we’ll show you all the materials and tools we used to build our overhead cabinets.

Disclosure: As an Amazon Associate, this site earns from qualifying purchases. Though we may earn a commission, the price you pay always remains the same.
Step 1: Overhead Cabinet Layout Planning & Dimensions
Before constructing your camper’s overhead cabinets, it’s a good idea to plan ahead to know where you want to install your upper cabinets and their overall dimensions.
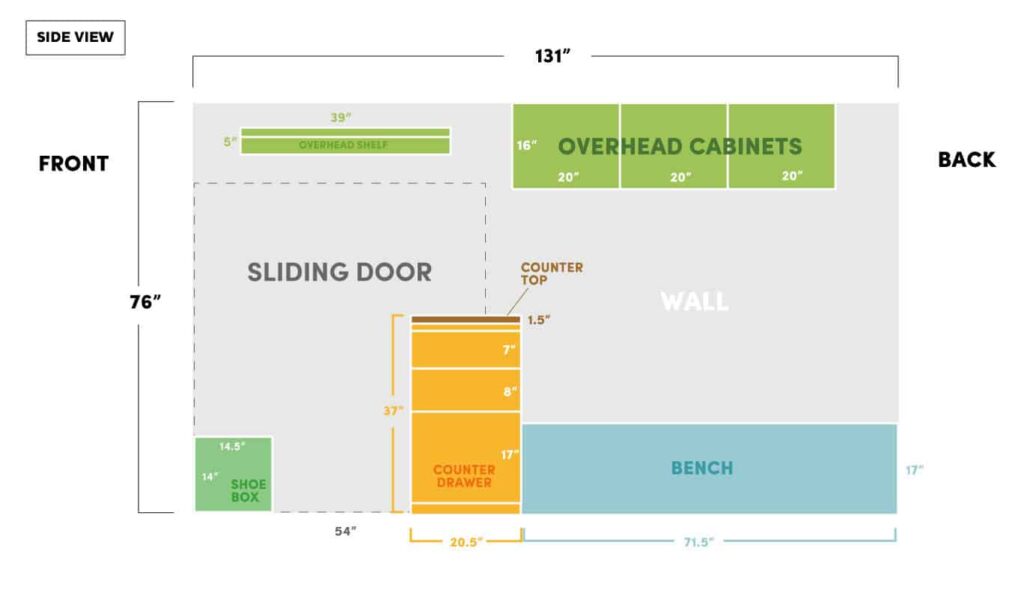
We recommend creating a digital floor plan for your camper interior. This is a great way to visualize how all your interior furniture will look inside your van. In the below graphic, you can see how we created a digital layout of our van. Our upper cabinets are shaded in green.

In the floorplan below, we show our overhead cabinets on the passenger side of our van.
Want to know how we made this layout? Read our camper van layout post to learn how to create your floorplan graphic using any old free software.
Overhead Cabinet Dimensions
How big? How long? How deep?
These are all questions you’ll need to ask yourself when planning your overhead cabinet dimensions. Here are some considerations to think about when planning the size of your cabinets:
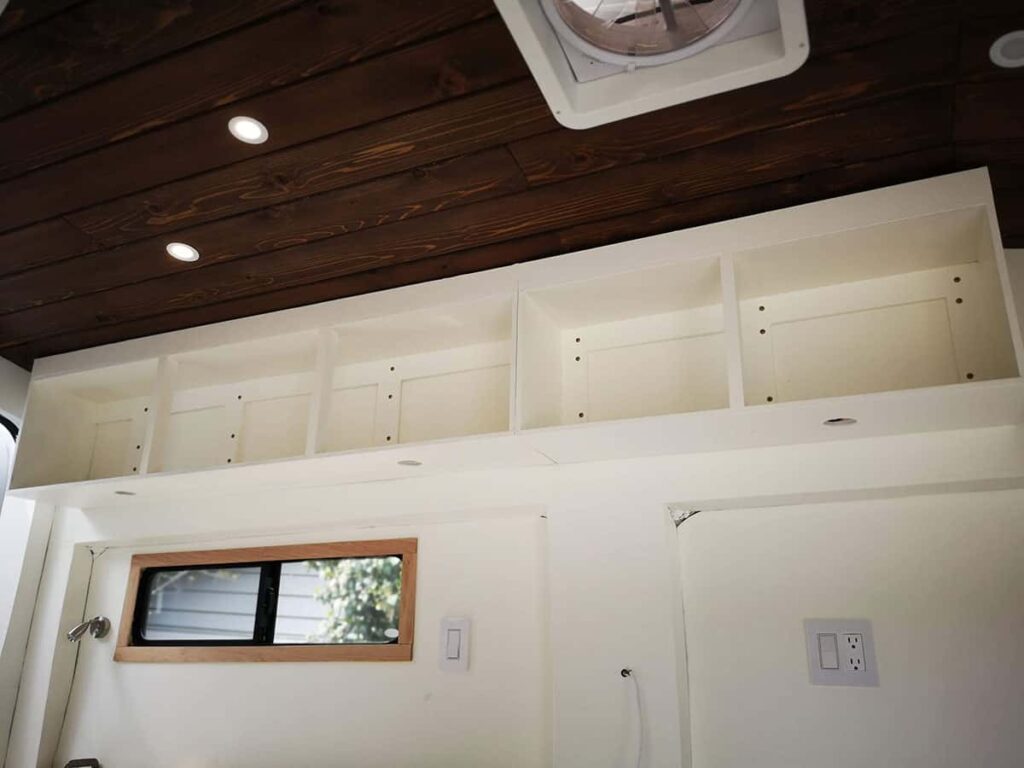
- Height of vehicle – The taller the vehicle, the taller your cabinets can be. We have a high-roof van, which allows our overhead cabinets to be 16” tall.
- Airspace – Think about how much airspace you would like between your cabinets, bed, and kitchen counter. If your cabinets are too tall, they may get in the way when you’re trying to cook or sit up in bed.
- How much to store? – What percentage of your overall van storage space do you want your overhead cabinets to occupy? Because we had a convertible bed (which allows for less storage capacity than a fixed bed), we wanted to maximize our upper cabinet storage space by having large, full-length cabinets.
The exact dimensions of our camper van’s overhead cabinets are:
- Driver side – W119.5″x H16″
- Passenger side – W60″ x H16″
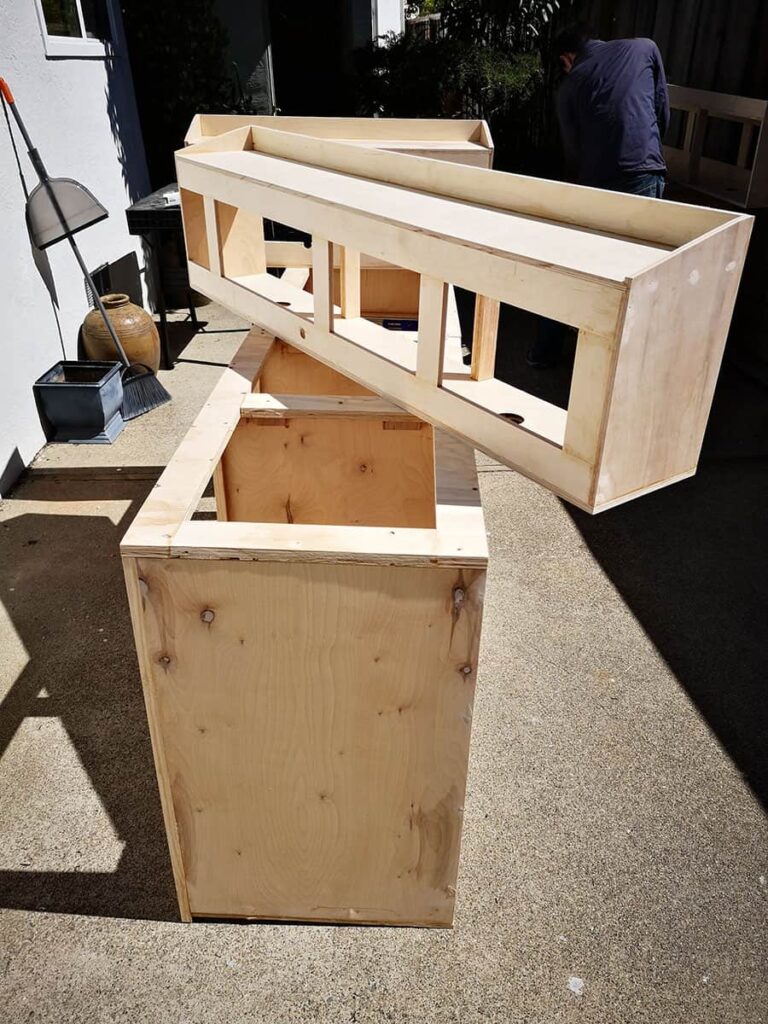
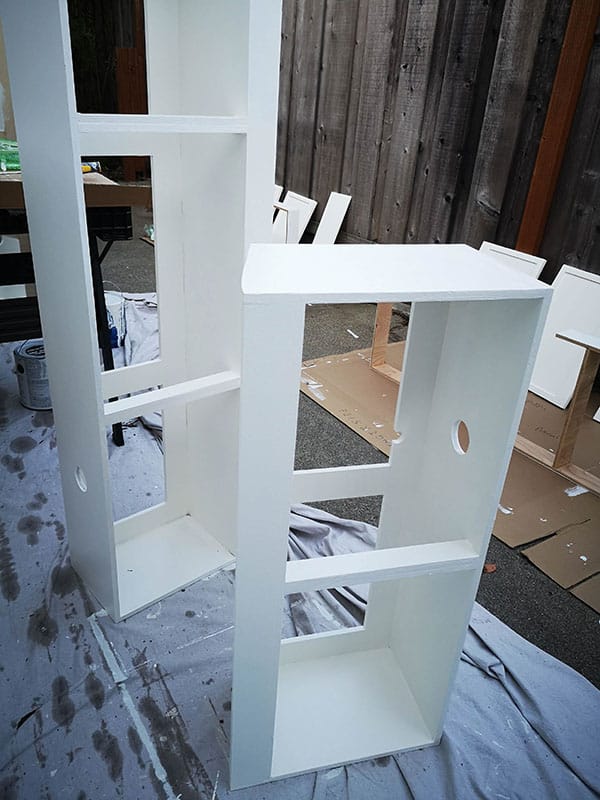
Step 2: Constructing the Overhead Cabinet Frame
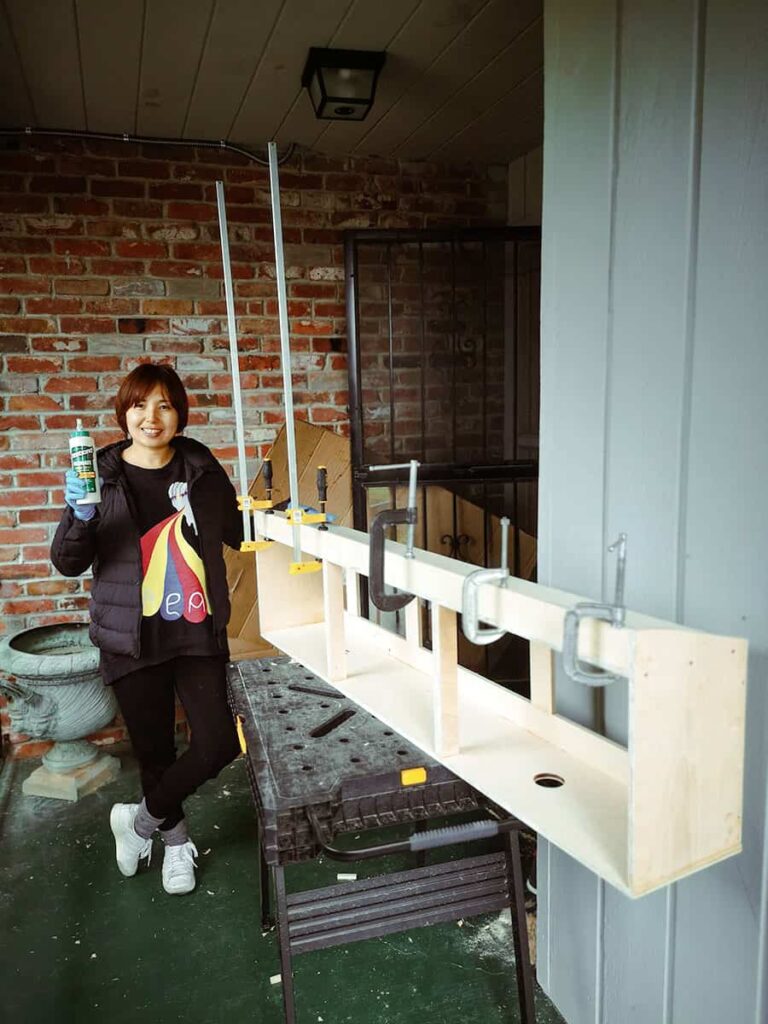
Once you’ve finalized the overall dimensions, the first step is to build the frame of the overhead cabinet. At the bottom of this section, we will link to our favorite cabinet tutorial video on YouTube, but before we do, we want to review some vital information first.
Best Wood Material for Overhead Cabinet
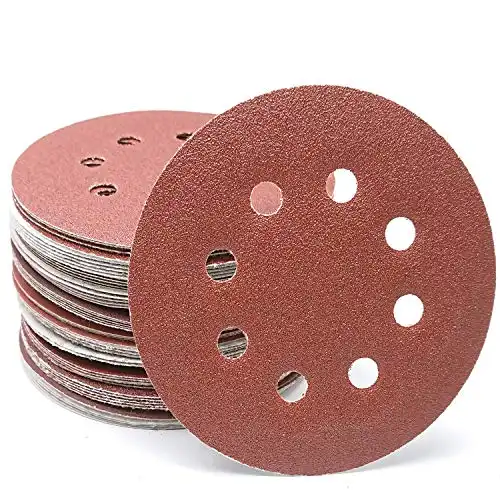
When building overhead cabinets for your van, we recommend going with ½” plywood. We find that the ½” thickness is perfect for both durability and thickness.
We highly recommend visiting a local lumber yard and looking for “Baltic Birch” plywood if you can find it. It’s a higher quality, stiffer plywood that isn’t as prone to warping as the standard Birch plywood that you can find in big box stores like Home Depot.
Top Tip To Create Strong Cabinet Joints
Because these cabinets will have to carry a lot of weight AND withstand relentless vibration and jolts while driving, creating solid and resilient joints between the different plywood pieces is imperative.
Simply relying on wood screws to keep the wood joints together will not be enough.
To create a stronger, more robust joint, we used a combination of brass wood screws and wood glue.
When joining two plywood boards together, place a bead of wood glue on the edge of one of the boards and screw the two boards together with wood screws. We placed our screws 2” apart. That’s a lot of screws, but we want the cabinets to be able to hold the weight of all our items, especially while driving on bumpy roads.
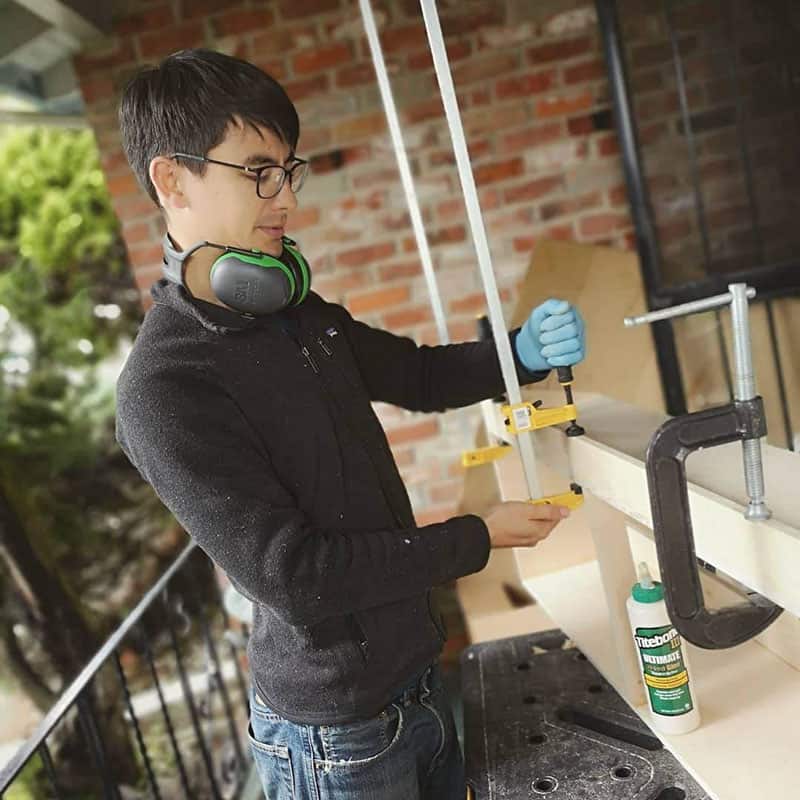
DIY Pro Tip: Investing in several long clamps is essential to allow the wood glue to cure the plywood boards in the proper position.
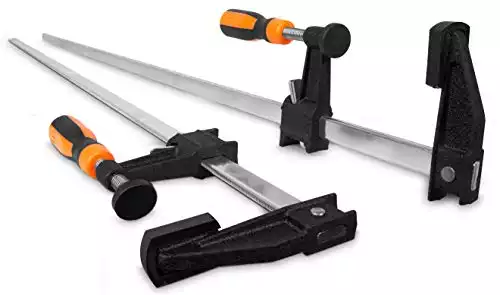
These long clamps are great when building overhead cabinets, kitchen counters, and the bed frame. They keep wood in place while the wood glue dries.
Overhead Cabinet Frame Construction Directions
Below is a step-by-step framework for building your overhead cabinet frame.
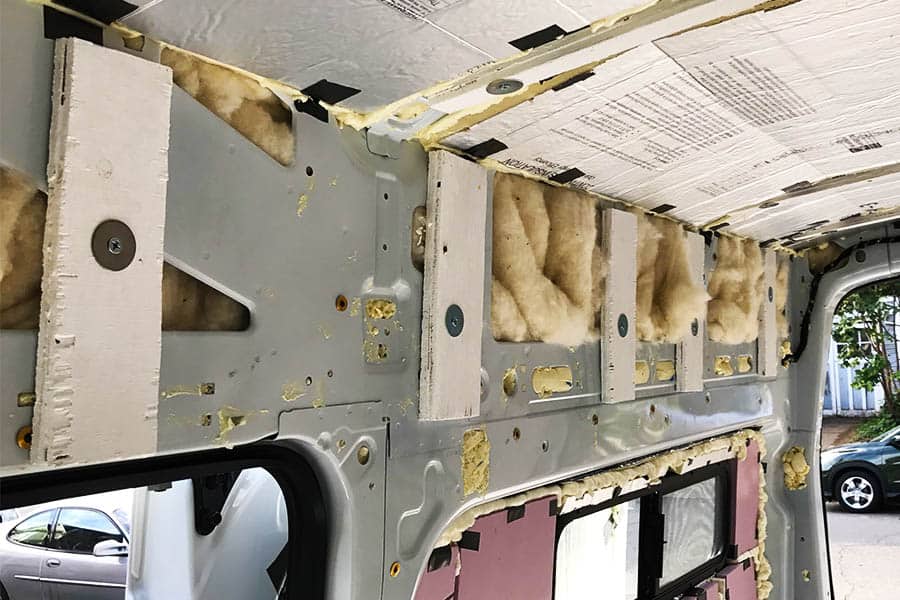
- Scribe your cabinet sides – Your cabinets’ gables (sides) must be scribed to fit perfectly with the curvature of your van’s walls and ceiling. Use a cardboard template to create that perfect gable shape, which you can transcribe to your plywood boards later. (See the video below for reference.)
- Cut the plywood – Cut out the boards you need for your cabinet’s top and bottom horizontal pieces.
- Assemble plywood – Attach your cabinet gables to the top and bottom plywood boards with wood screws and wood glue.
- Drill holes for light installation – If you attach LED lights to the bottom of your cabinets, drill the necessary holes you need now.
Step 3: Build & Attach Overhead Cabinet Fronts
With the finished cabinet frame, you can now create your cabinets’ fronts (doors). For our cabinets, we used:
Recommended Cabinet Door Dimensions
We made a mistake when sizing our cabinet doors. We wanted our cabinet doors to have a streamlined look, so we only planned a ¼” gap between each door.
However, having such a small gap means you have a small margin for error when attaching the cabinet doors to the frame. In our case, some of our cabinet doors will rub against each other when lifted simultaneously.
If we could do our cabinet doors again, we’d leave a larger 1” gap between each door.
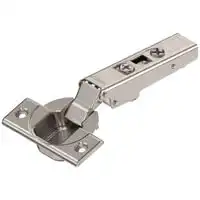
Recommended Hinges
We looked at several cabinet door hinges but ultimately loved the Blum soft-close hinge. While plenty of cheaper hinges are available online, we liked the high-quality feel of these Blum hinges.
Also, the soft-close feature of these hinges means we don’t have to worry about our cabinet doors smashing into the frame. After 3+ years in the van, we take these soft-close hinges for granted.
The two downsides to using these Blum hinges are:
- You will need ¾” plywood for the cabinet doors instead of the ½” plywood you used to make the cabinet frame.
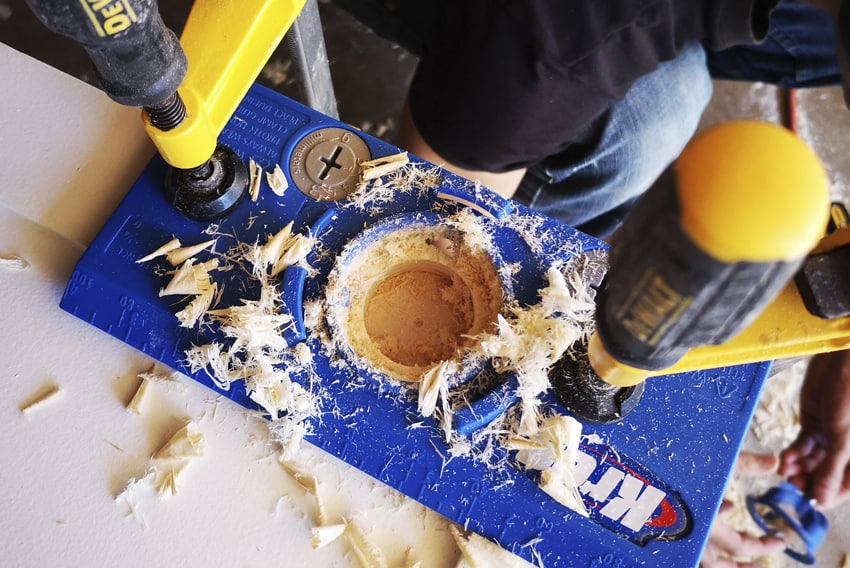
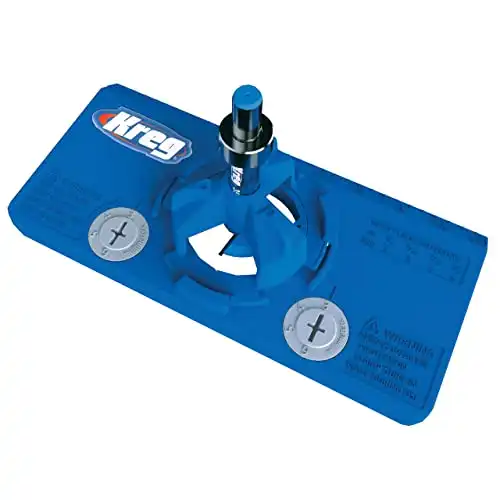
- You’ll need to purchase the concealed hinge jig to install the hinge in your doors.
But if we could build another set of van overhead cabinets, we would use the same hinges as we have now.
Drills perfect holes to install concealed hinges on your cabinet fronts. The placement guides makes it simple to drill consistent and level holes every time.
Cabinet Door Handles

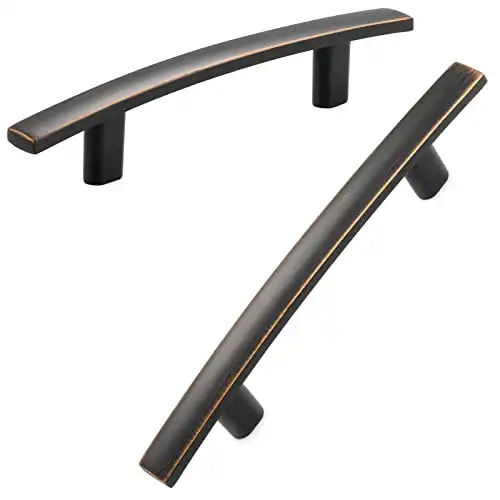
We loved the elegant oil-brushed copper look of our handles.
Instead of trying to estimate where to drill the holes to install the handles, we purchased the v to take the guesswork out of the process. Using the jig ensured that our drill holes would be perfectly level and perfectly spaced apart for our handles.
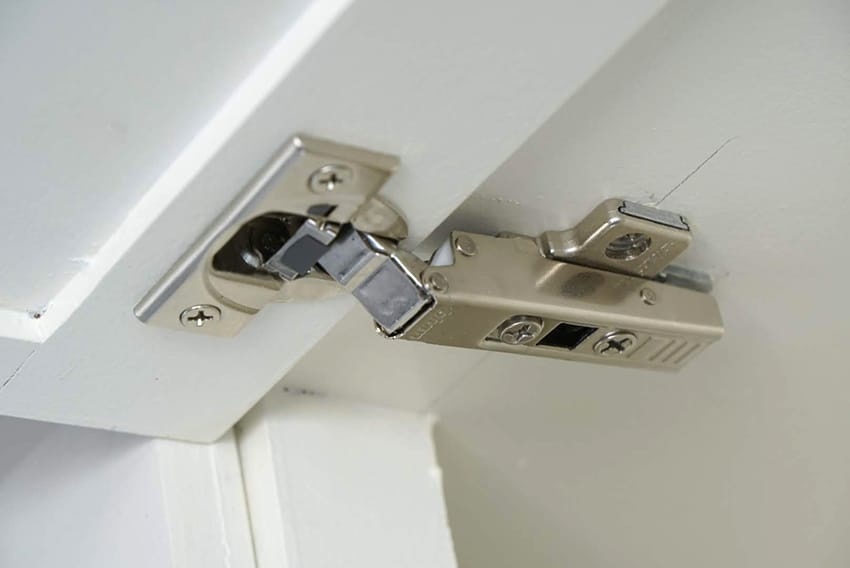
Attaching Gas Struts
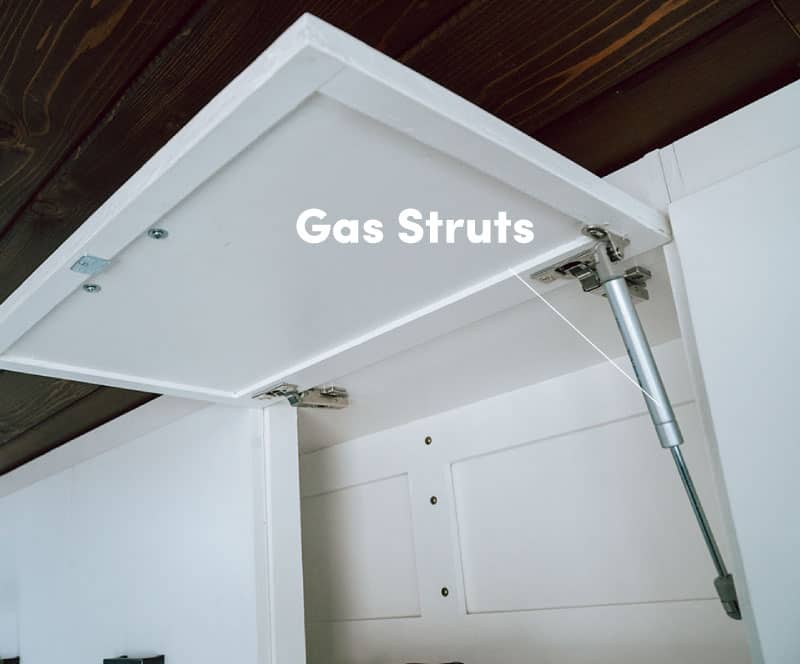
With the hinges and handles installed, we moved on to installing gas struts. Gas struts help to hold our fronts open while we move things in and out of our cabinets.
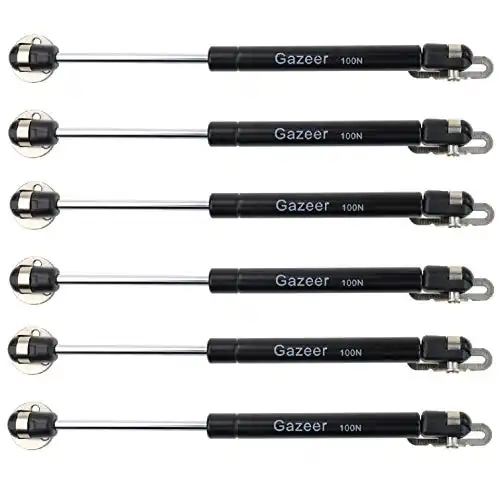
Keeps overhead cabinet doors open. Useful so that you don't have to use your hand (or head) to keep them open.
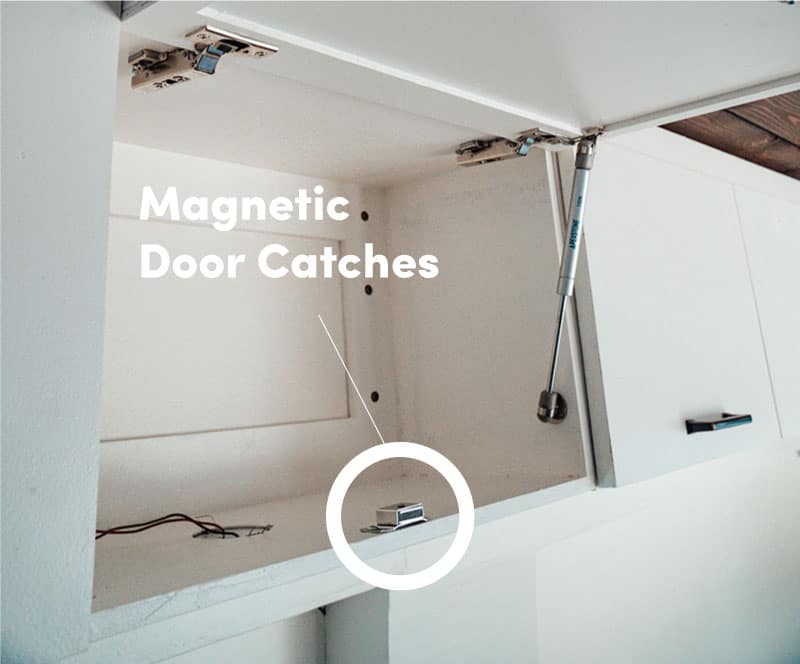
5. Installing Magnetic Door Catches
We could now install magnetic catches with the cabinet doors attached to the frame. This would help prevent our upper cabinet doors from swinging open while driving.
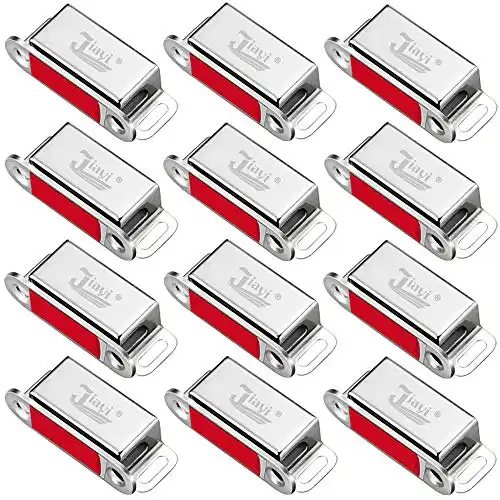
Keeps cabinet and drawer doors closed while you drive.
Installing magnetic catches is simple enough. Screw down the main magnetic housing in the center of the cabinet frame and screw in the single magnetic piece onto the door.
Simple. And for our upper cabinets, these magnetic catches work great!

Step 4: Mold Treat the Upper Cabinets
With the cabinet frame and doors built, you’re ready to sand and paint them.
We sprayed our frame and doors with an anti-mold solution to prevent mold growth on the plywood boards. This spray is quick and convenient and was also used in other parts of our van build, including our:
- Walls
- Sub-floor
- Furring strips
- Kitchen cabinet
- Bed frame
Apply a good coat of the anti-mold solution to the cabinet plywood boards and let them dry.

Kills mold and mildew and prevents regrowth. Contains no harmful chemicals or fumes. Just spray and allow to dry. We used this spray on our subfloor, walls, and furniture.
Step 5: Sanding & Painting Overhead Cabinets
With the cabinet frame and doors built, you’re ready to sand and paint them. Here are the products you need for this step.
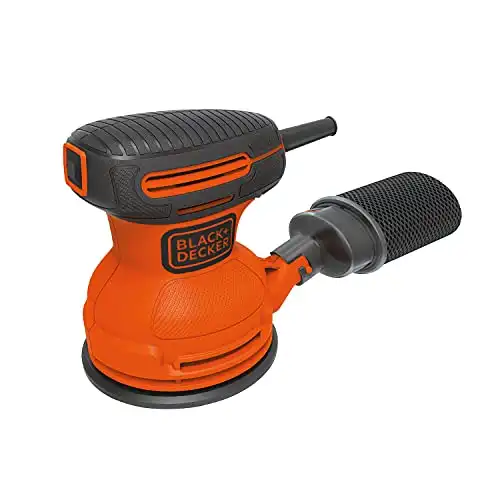
Sanding
Once the anti-mold solution has dried, sand the cabinet frame to create a smooth surface before painting.
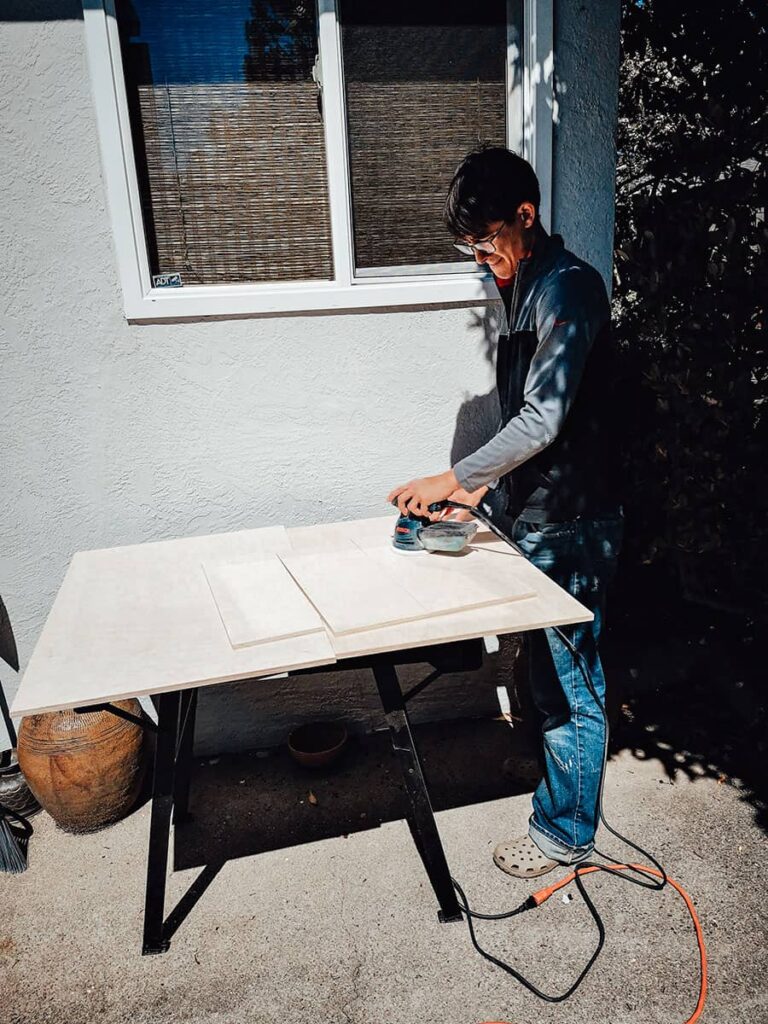
With an electric sander, go over the plywood boards with 80-grit sandpaper. 80-grit paper is course, but it will sand down the rougher areas of the plywood.
Afterward, go over the plywood boards again with 120-grit sandpaper to smooth the surface.
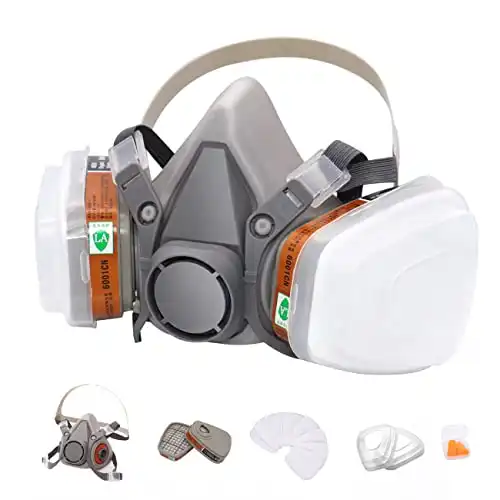
DIY Pro Tip: We recommend wearing a filtered mask while sanding and painting. Keep those particles and toxic gasses out of your lungs. We did not use a mask while sanding but bought one later for painting, which helped us breathe more easily.
Painting
After sanding, we applied two coats of Anti-Mold Primer and two coats of the same “Twinkling Lights” white paint we used on our walls.
In our case, the white paint we selected is the same color as our walls. To learn more, check out our other post, “why white walls are best for camper vans.”
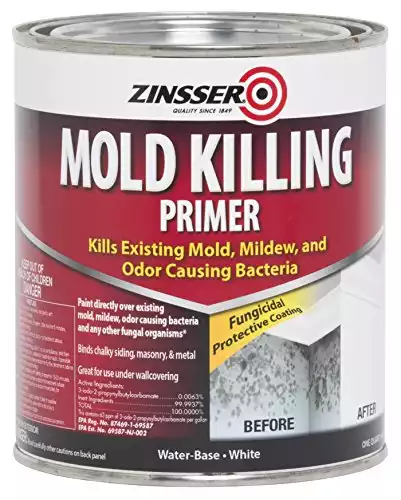
Kills existing mold and mildew and prevents their regrowth. Best used after Concrobium mold spray. Apply two layers of primer onto the subfloor, walls, and furniture.
Step 6: Mounting Overhead Cabinets to Van Walls
You can mount the cabinets to your van’s walls when the paint has dried.
Ensure Furring Strips Are Installed First
Simply screwing your overhead cabinets to your van’s thin plywood walls won’t give the cabinets the grip they need to stay attached. With all the vibration and side-to-side sway, your van’s cabinets may rip out over time.
We recommend installing furring strips to your van’s metal walls. These furring strips will help to securely hold your walls, cabinets, and all future furniture you intend to place in your van.
Mount The Overhead Cabinets
Attaching upper cabinets inside a camper van is a 3-person job; one person holds each end of the cabinet in the proper place, and the third person puts in the cabinet screws.
For this job, we used GRK cabinet screws. These screws work perfectly for the job because of the larger screw head area and because they are self-tapping screws, meaning no pre-drilling is required.
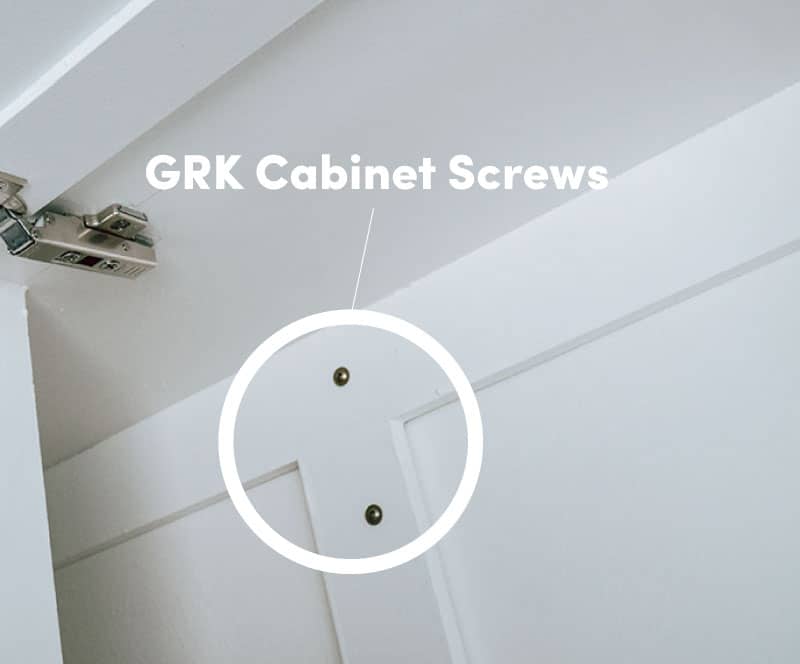

We use these cabinet screws to fix our overhead & kitchen cabinets to our walls and furring strips. The course screw threads help maintain a strong grip on the furring strips, which prevent our cabinets from falling down.
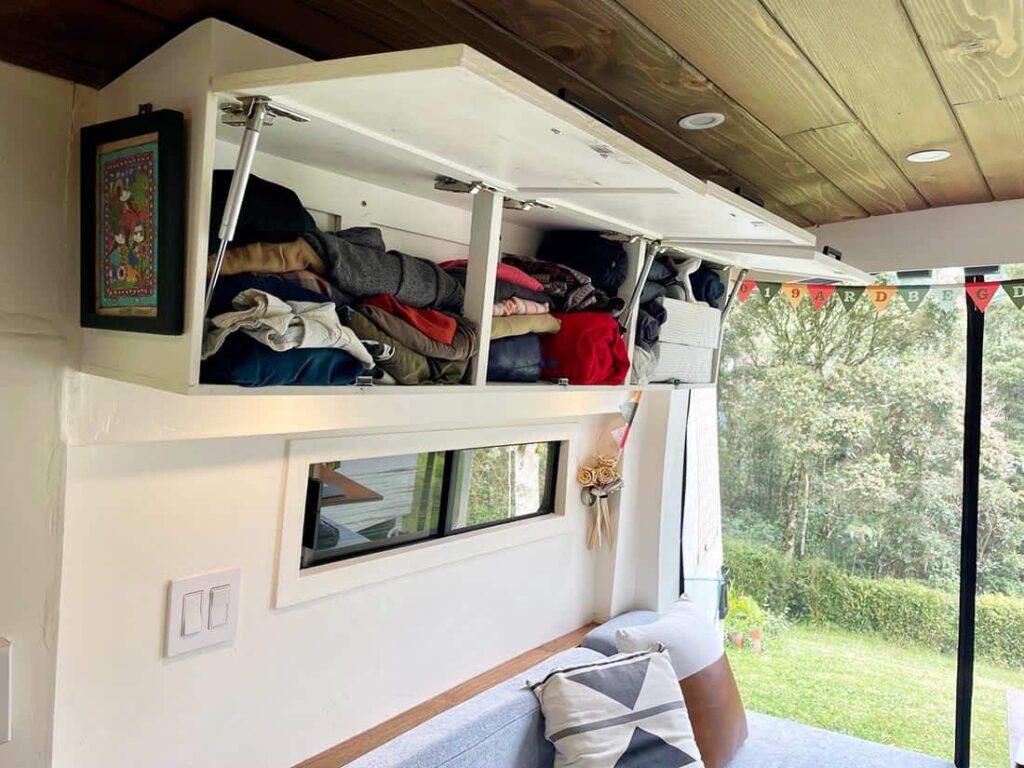
Finished Van Cabinets Result
You should have beautiful upper cabinets installed in your van when all is finished.
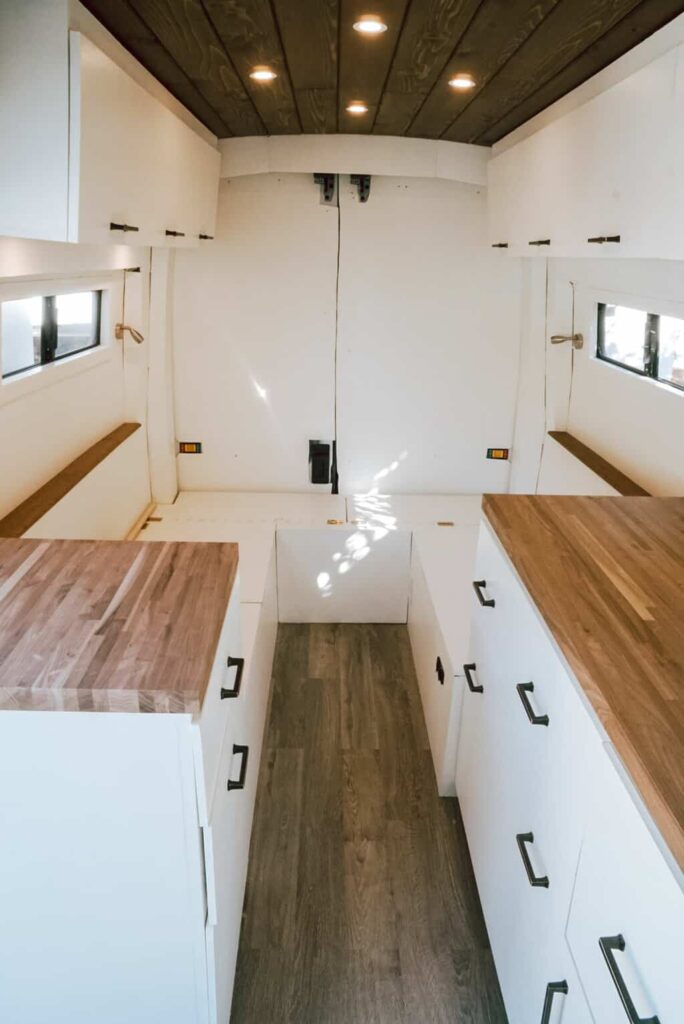
In our case, we’ve driven 60,000+ miles, many of them on horrendous Latin American roads, and our upper cabinets have survived the journey. They’ve successfully held the weight of all our storage items and still hold tightly to our van’s walls to this day.
Camper Van Overhead Cabinets Video
See our overhead cabinets in action.
Watch our campervan tour video below. The video automatically skips right to when we start talking about our cabinets.
This video shows all the small intricacies of our upper cabinets, like our hinges, magnetic catches, handles, and gas struts.
We hope you enjoy it!

Campervan Upper Cabinets – Conclusion
Thanks for reading our overview on installing strong and beautiful overhead cabinets in a camper van. We’re delighted with how our cabinets turned out and confident that your installation project will go smoothly.
To read more specific campervan build articles like this, head to our DIY Campervan Build Guide Homepage.
If you have questions about building overhead cabinets in a camper van, please let us know in the comments below.
Happy building!

Van Conversion Essential Bundles
Every resource on our website is 100% free to download and use. We don’t charge you, and we don’t require your email address. Happy building!