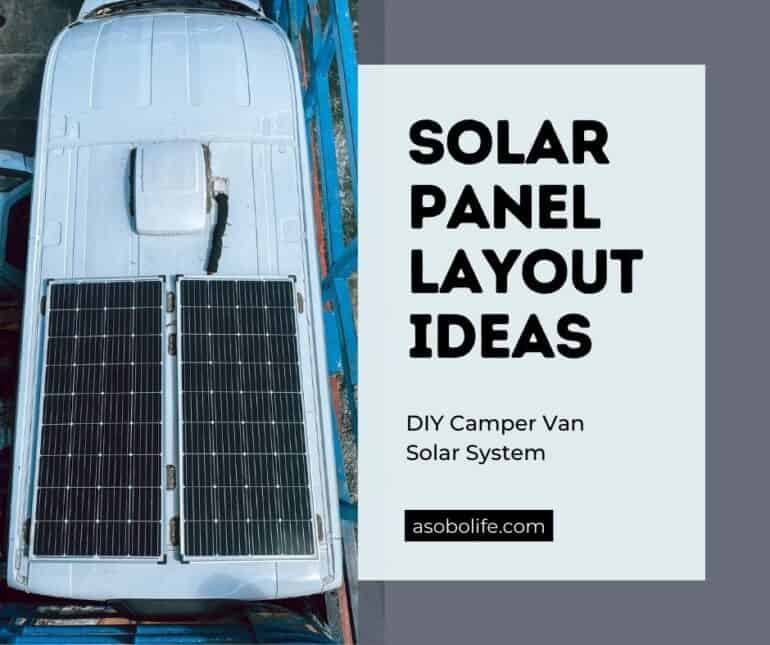
How To Mount Solar Panels on a Camper Van Roof (or RV)
Mounting solar panels on a camper van roof can feel like the most daunting process of a van conversion build, mainly because it involves drilling through the van’s roof.
But if you follow this step-by-step guide and are careful throughout the process, we’re confident you can install your panels without incident. Our solar panels remain firmly bonded to our camper van’s roof and have been leak-free since the beginning.

Disclosure: As an Amazon Associate, this site earns from qualifying purchases. Though we may earn a commission, the price you pay always remains the same.
Step 1: Attach Z-Brackets to Solar Panels
Assuming you’ve already checked that your panels aren’t defective, you’re ready to begin.
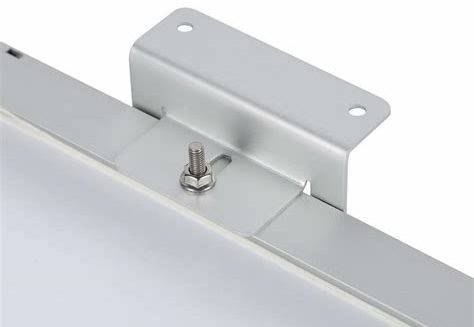
As they come, solar panels cannot be mounted onto a camper van’s roof. So, to do this, you must purchase one set of mounting brackets (Z-brackets) for every panel you have. Each set of Z-bracket mounts comes with the bolts & nuts needed to attach to a rigid solar panel’s aluminum frame.
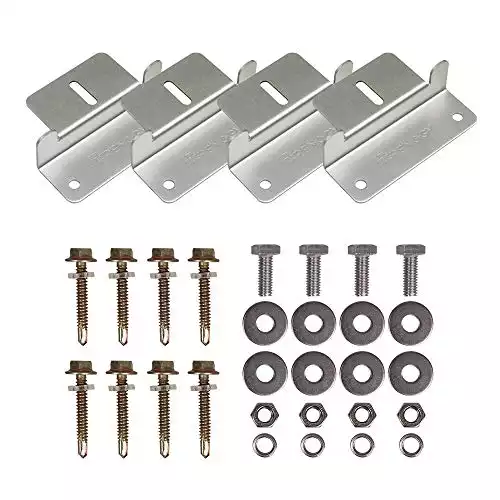
Standard mounting brackets for solar panels. These Renogy brackets are made from lightweight aluminum and come with all the required hardware. Each solar panel requires one set (four brackets).
Stagger Your Z-Brackets: If you plan to install multiple solar panels side-by-side, stagger the placement of your Z-brackets so that the mounts don’t butt up against each other when on the roof. (Refer to picture in Step 3)
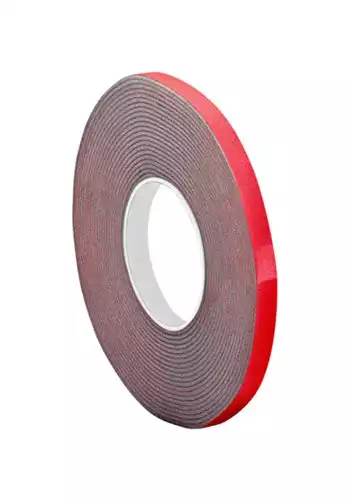
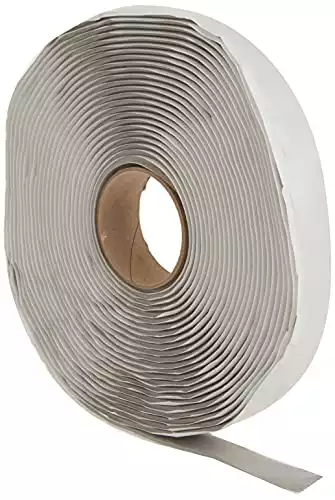
Step 2: Adhere VHP & Butyl Tape to Z-Bracket Feet
If you screw the solar mounts directly onto the van’s roof, without additional protection, the chance of having leaks is high. This method also creates low pull-out resistance, and the panels could easily fly away when driving at high speeds.
You can eliminate these problems by applying a combination of VHB and Butyl Tape to the underside of the z-bracket feet. Refer to the diagram below. This side will be placed directly onto the van’s roof.
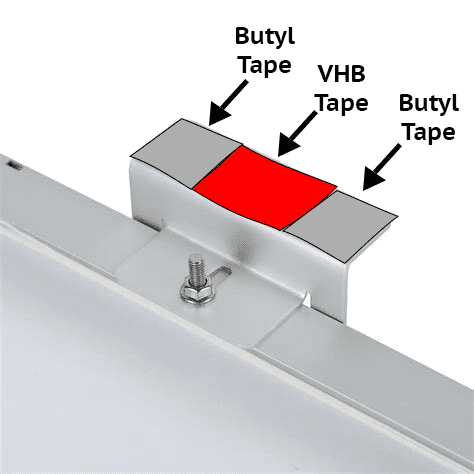
This way, the butyl tape will act as a waterproof seal around the screw holes and the VHB tape in the middle will provide additional adherence between the solar panels and the roof.
Installation Tip: Do a practice run and place the solar panels on your camper van’s roof without the VHB and butyl tape. This way, you can move the panels around and plan precisely where you want your solar panels to sit before adding the tape.
Step 3: Mount Solar Panels on Van Roof
Because both the VHB and Butyl Tape are on the Z-brackets, you’ll want to place the solar panels in the exact spot you want them located. Once you place the panels down on the roof, it will be difficult and messy to relocate them again.
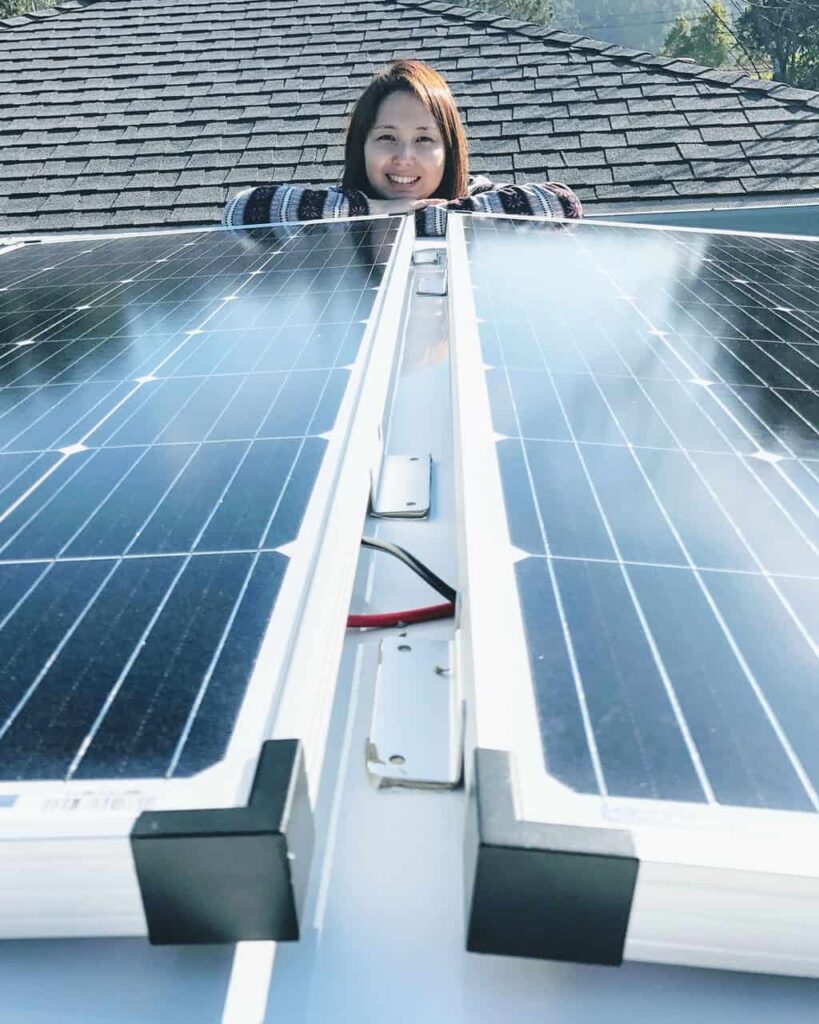
Installation Tip: Ensure the red & black solar wires (attached to panels) are brought out from under the panels. You don’t want any wires trapped under the panels after the VHB tape bonds the panels to the roof.
Step 4: Screw Solar Panels to Van Roof

The Z-bracket mounts come supplied with screws.
When you drill the screws through the roof, you’ll notice that the Butyl tape compresses and begins to get squeezed out the sides of the Z-bracket feet. This is a good sign and tells you that a water-tight seal is being formed around the screw hole.
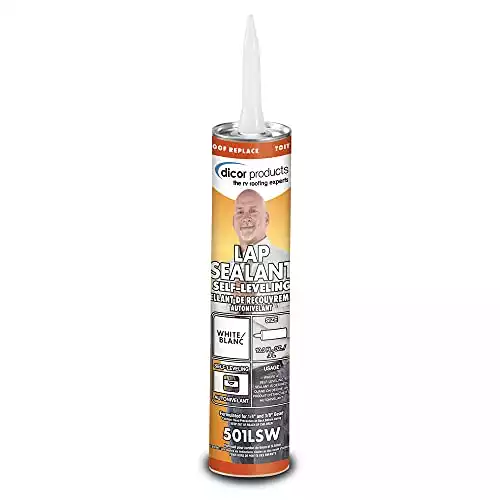
Step 5: Cover Z-Brackets With Lap Sealant
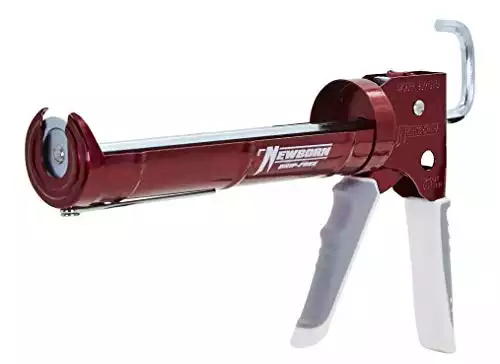
Once the panels are screwed down, extrude Dicor Lap Sealant over each z-bracket foot, with a caulking gun, for an additional layer of waterproof protection.
We like this particular waterproof sealant because it’s quite viscous and flows well, which makes it easy to apply onto surfaces and quickly smothers all the gaps and crevices to create a tight, leak-free seal.
Step 6: Let Everything Dry & Cure
As a last step, we covered our roof with a tarp for 48 hours to allow the VHB tape, Butyl Tape, and Lap Sealant to cure fully.
Mounting Flexible Solar Panels on an RV Roof
We don’t have flexible panels on our roof, but if we did, we would use the below video as our guide.
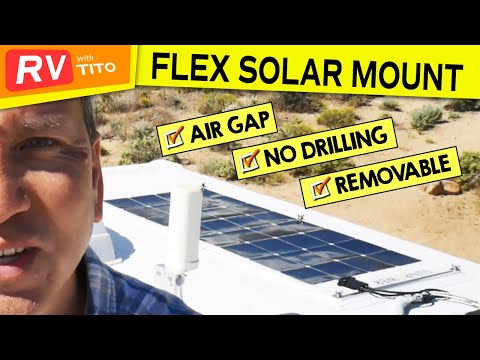
Flexible solar panels often suffer damage from excess heat because these panels cannot efficiently dissipate the heat beneath them, unlike rigid panels. But ‘RV With Tito’ seems to have found a solution to this problem while simultaneously not drilling ANY holes on his RV roof. Enjoy!
What’s Next? How To Wire Your Solar Panel System
Now that your solar panels are mounted on your van’s roof, you might be ready to wire your solar system to your batteries. If that’s the case, visit our complete DIY solar system guide to help get you started.
Final Thoughts: Mounting Solar Panels Isn’t So Bad!
We hope you’ve found this guide to mount solar panels to your RV roof useful.
After you’ve successfully attached your solar panels, you’re ready to wire them to your batteries so that you can begin the solar charging process. Check out our other articles below for more van life solar resources.
For any additional questions about how to mount solar panels on a camper van roof, please post a comment in the section below.
Happy building!
Appendix: Test Solar Panels For Functionality
Realizing you have a defective solar panel AFTER mounting it on your RV roof is a big headache. So, ensure your solar panels function correctly once you get them out of their shipping box.
Testing the functionality of your solar panels is quick and easy to do. It’s best to use a digital multimeter.
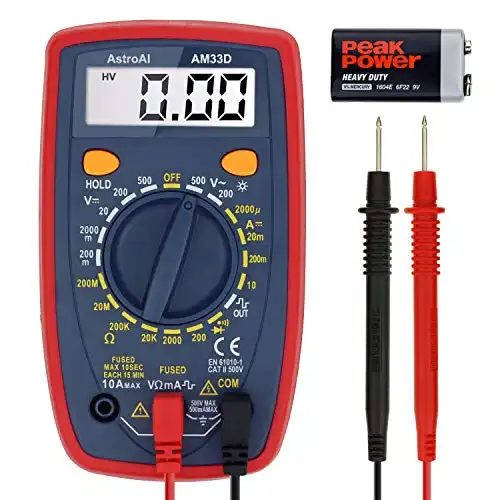
Digital multimeters are a great way to get electrical readings all throughout the van's electrical system. They display battery voltage, measures DC current, and can help troubleshoot many electrical issues that you might incur in the future.
How To Test Your Panels Before Mounting
- Place solar panels under direct sunlight to begin electricity production.
- Locate your panel’s ‘Pmax voltage.’
- You can find this in the instruction manual or even on the product page on Amazon.
- Your panels should get a reading close to its Pmax under ideal situations (clear sunny day & pointed directly at the sun).
- Set your multimeter to read the appropriate voltage range.
- Note: In most cases, the dial should be set to 200 volts.
- Attach the ends of the supplied red and black wires to the multimeter device and the other ends (the probes) to the solar panel’s wires.
- Note: Each panel will have MC4 connectors attached to their supplied wires. So you’ll likely you’ll have to search for the metal conductors inside the MC4 connectors to touch the probes to.
- Compare the panel’s voltage reading to the panel’s theoretical voltage Pmax.
- The goal should not be to 100% match the Pmax voltage but to get close. Real-world data never quite matches data from a lab.

Van Conversion Essential Bundles
Every resource on our website is 100% free to download and use. We don’t charge you, and we don’t require your email address. Happy building!